


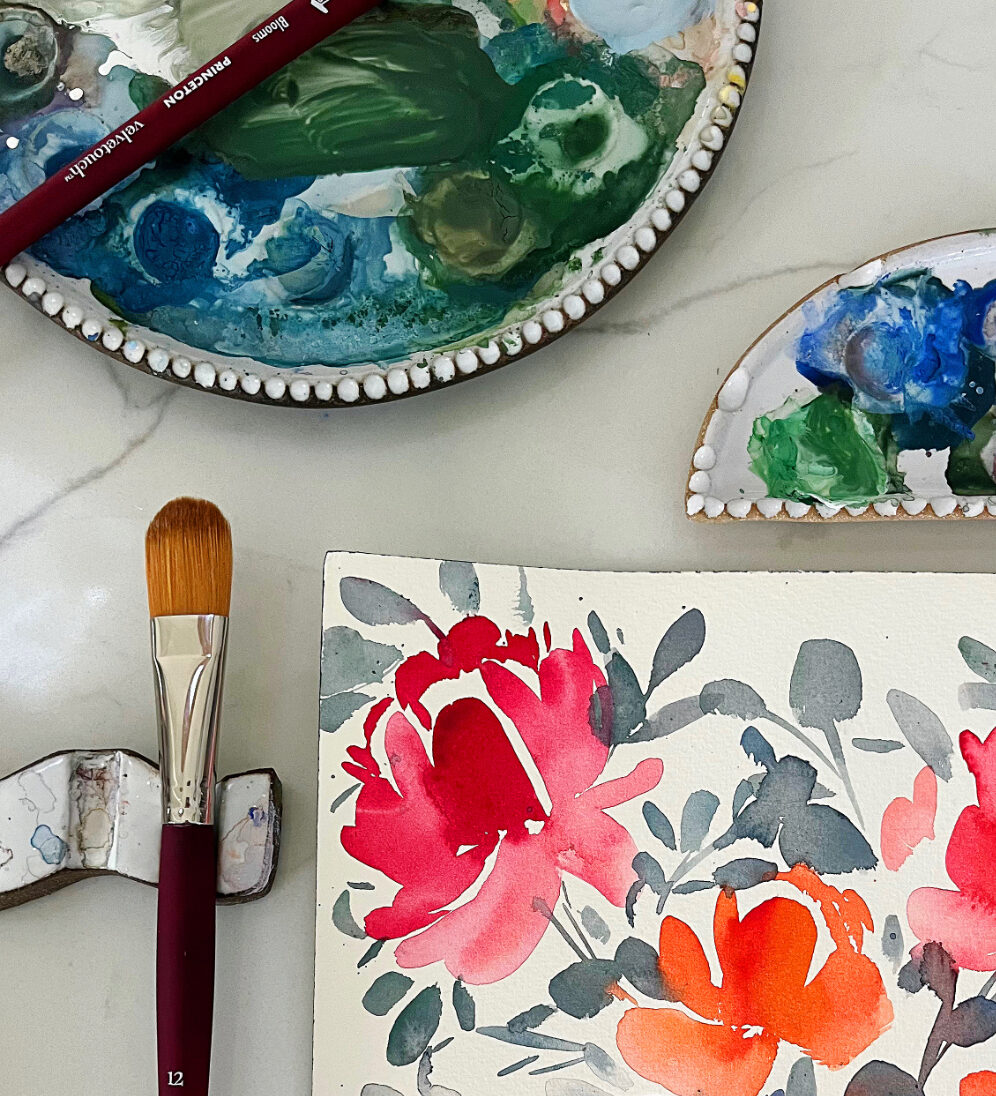
Building my own watercolor palette was one of those quiet game changers in my art journey (the kind you don’t realize you needed until you do it). Once I stopped using whatever colors came in a set and started choosing my own, everything clicked. My colors mixed better. My paintings felt more intentional. And honestly, painting became more fun.
A watercolor palette isn’t just a place to hold paint. It’s a tool that shapes how you mix, how you paint, and how confident you feel while creating. Whether you’re painting loose florals or scenery watercolor paintings, setting up a palette that works for you makes a huge difference.
Let me walk you through how I build a watercolor palette using warm and cool primaries, plus mixing colors that actually make sense.
Choosing Your Paints
This is where everything starts. The paints you choose will affect every single mix you make later.
I always recommend starting with warm and cool versions of each primary color. That means a warm red and a cool red. A warm yellow and a cool yellow. A warm blue and a cool blue. This setup gives you more mixing control without needing a million tubes of paint (which is tempting, I know).
Warm colors lean toward orange or red. Cool colors lean toward blue. When you mix a warm red with a cool blue, you get cleaner purples. When you mix warm yellow with warm red, your oranges glow instead of turning muddy. It’s simple, but powerful.
I personally use professional paints because the pigment load is stronger and blends more smoothly, especially for wet on wet watercolor techniques. That said, student grade paints can still work beautifully. What matters most is learning how your paint behaves.
Your watercolor palette should feel flexible, not overwhelming. Six to twelve colors is more than enough to start.
If you want help choosing paints without wasting money (been there), I put together a full breakdown of what actually matters in watercolor paint and how to pick the best watercolor palette for your style. Read my ultimate guide to the best watercolor paint on the blog.

Selecting a Palette
Now let’s talk about the actual watercolor paint palette.
You don’t need anything fancy. I’ve used ceramic palettes, plastic palettes, and travel palettes. What matters is having enough wells for mixing and enough space to let colors breathe.
I love palettes with individual paint wells and larger mixing areas. The mixing space is just as important as the paint space. This is where you’ll test colors, adjust water, and create custom mixes for your paintings.
Plastic palettes are lightweight and affordable, but they do have one annoying issue. Beading. If your paint pulls away into tiny droplets instead of spreading, that’s beading. It’s common with new plastic palettes and it can be super frustrating.
The good news is it’s fixable. Once you prep your palette, it behaves so much better and your watercolor techniques feel smoother and more predictable.
If beading has ever made you want to throw your palette across the room (same), I walk you through an easy fix that actually works. Head to my blog post on how to stop paint from beading on a plastic palette.
Arranging Colors
How you arrange your colors matters more than you might think.
I arrange my watercolor palette in a rainbow order. I usually start with neutrals like black or brown, then move through red, orange, yellow, green, blue, and violet. I also separate warm and cool versions so they don’t accidentally mix.
This setup helps prevent muddy colors. If a little paint sneaks into the wrong well, it’s less likely to ruin a mix. It also makes color mixing feel intuitive. Your eye learns where things live, and that speeds everything up while painting.
When I’m working on watercolor paintings, this layout helps me move quickly between sky colors, greens, and neutrals without overthinking.
Your palette should feel familiar, almost automatic.
Setting Up and Drying Your Paints
I mostly work with dried paint straight from the tube. After squeezing paint into my palette, I let it dry for at least a full day before using it. This helps the paint last longer and prevents waste.
Wet paint straight from the tube disappears fast. Dried paint reactivates beautifully with water and gives you more control.
Once your paints are dry, your watercolor palette becomes portable and reliable. You can open it, paint, close it, and come back later without worrying about mess or spills.
It’s one of those small habits that makes painting feel easier.

Warm vs. Cool Mixing Wells
This is one of those small setup choices that pays off every single time I paint.
I keep separate mixing wells for warm and cool colors so my mixes stay intentional. When I’m working quickly, I don’t have to second guess what’s already in a well.
If warm and cool mixes share space, they slowly drift toward brown without you noticing (sneaky, right). Separate wells give me cleaner washes, fewer do overs, and way more confidence mid painting.
This is especially helpful when practicing watercolor techniques like layering, glazing, and wet on wet washes.
Additional Palette Tips
Here are a few extra things I’ve learned along the way.
- Clean your palette regularly. Old paint buildup can affect new mixes.
- Use larger mixing wells than you think you need. More space equals better control.
- Don’t overcrowd your palette. Empty space is useful.
And remember, your watercolor palette isn’t permanent. You can change it. Swap colors. Experiment. Let it evolve with your style.
There’s no best watercolor palette for everyone. The best one is the one that supports how you paint.

Experimenting with Mixing Colors
This is where the magic really happens.
Once your watercolor palette is set up, spend time mixing. Not painting finished pieces. Just mixing. Create color charts. Test combinations. Push colors too far and see what happens.
This kind of play builds confidence fast. You start to understand how much water to use. Which mixes stay clean. Which combinations turn muddy.
When I practice mixing regularly, my watercolor paintings improve without me even trying. My skies feel softer. My greens feel more natural. My shadows feel intentional.
Color mixing is a skill, and like any skill, it gets better with practice.
If color mixing feels confusing or overwhelming, I break it down step by step in a beginner friendly way on the blog. Check out my color mixing watercolor tips for beginners to make mixing feel simple and fun.
Want to See Me Set Up a Palette?
If you’re more of a visual learner, I’ve got you covered.
In my video, I walk through exactly how I set up my watercolor palette, the paints I use, how I arrange them, and why I let my paint dry before painting. I also share how I prevent beading and how I separate warm and cool mixing wells.
It’s a full behind the scenes look at my process and it’ll help everything click.
Watching someone else do it can make all the difference.
Want Help Actually Using Your Palette?
If you’ve built your watercolor palette and you’re thinking, Okay… now what? you’re not alone (this is the exact spot most painters get stuck).
That’s why I created Everyday Watercolor Companion Course.
This course is where supplies, technique, and color understanding finally come together.
I walk you through color theory, value, and mixing in a way that’s visual and practical, so you can see how pigments actually behave on paper.
No guessing. No overthinking.
It’s focused, affordable, and designed to support you without overwhelm. If you want guided practice and real clarity with the palette you just built, this is the perfect next step.

Build Your Own Watercolor Palette
Building your own watercolor palette is one of the best things you can do for your growth as an artist. It simplifies your choices, improves your mixes, and helps you paint with more confidence.
Start simple. Stay curious. And let your palette grow with you.
You’ve got this.


+ show Comments
- Hide Comments
add a comment